ClickHouse Cloud
To connect your ClickHouse Cloud Database to Sequel, follow the below steps.
Step 1: Log in to your Sequel Account
Log in to your Sequel account here. If you don’t have an account, you can create one via the signup page.
Step 2: Open New Connection Screen
On the databases listing page, click on "Connect Database". This will open the connection screen.
Step 3: Choose ClickHouse Database Connection
In the database connector catalog, select ClicHouse. This will open a connection form. Provide a display name that will be visible to all users in your workspace.
Connecting Your ClickHouse Cloud Database to Sequel
Follow this guide to connect your ClickHouse Cloud Hosted instance to Sequel for querying and visualizing your data.
Step 1: Log in to Your ClickHouse Cloud
Go to Clickhouse cloud and log in to your account.
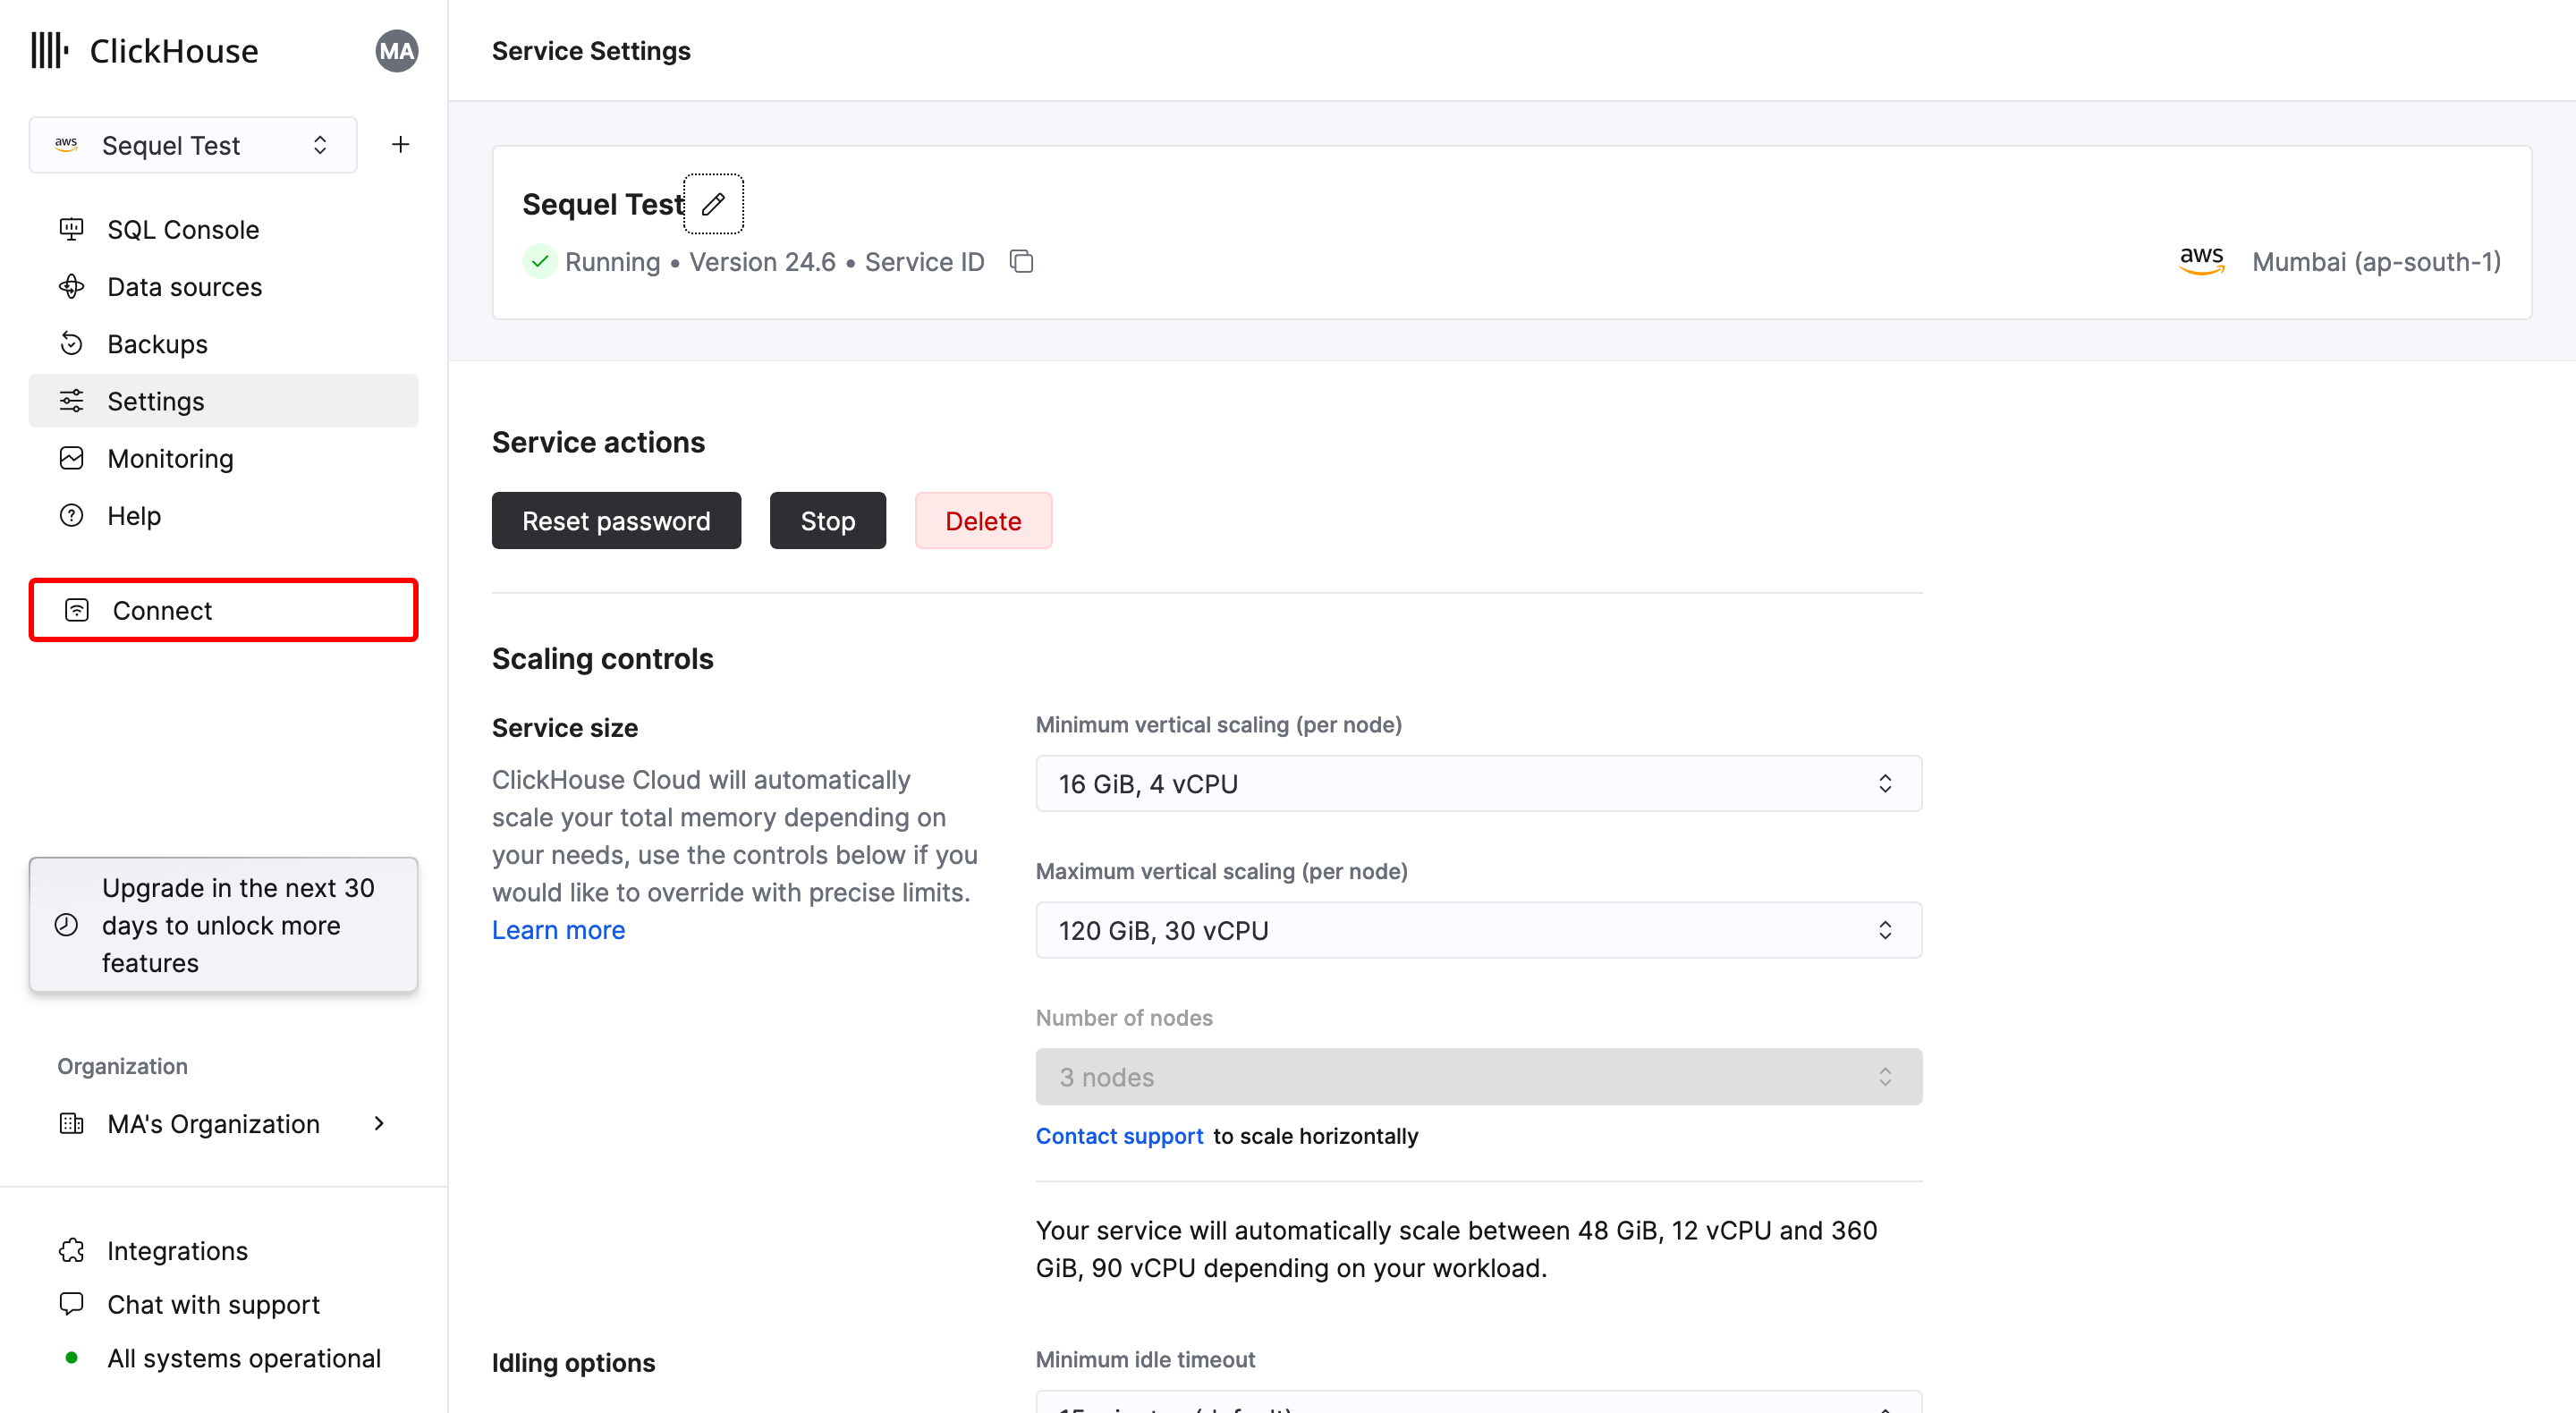
Step 2: Chosse your project and click on connect
After logging in, select the project and click on Connect from the left side bar

Step 4: Access the Connection Details
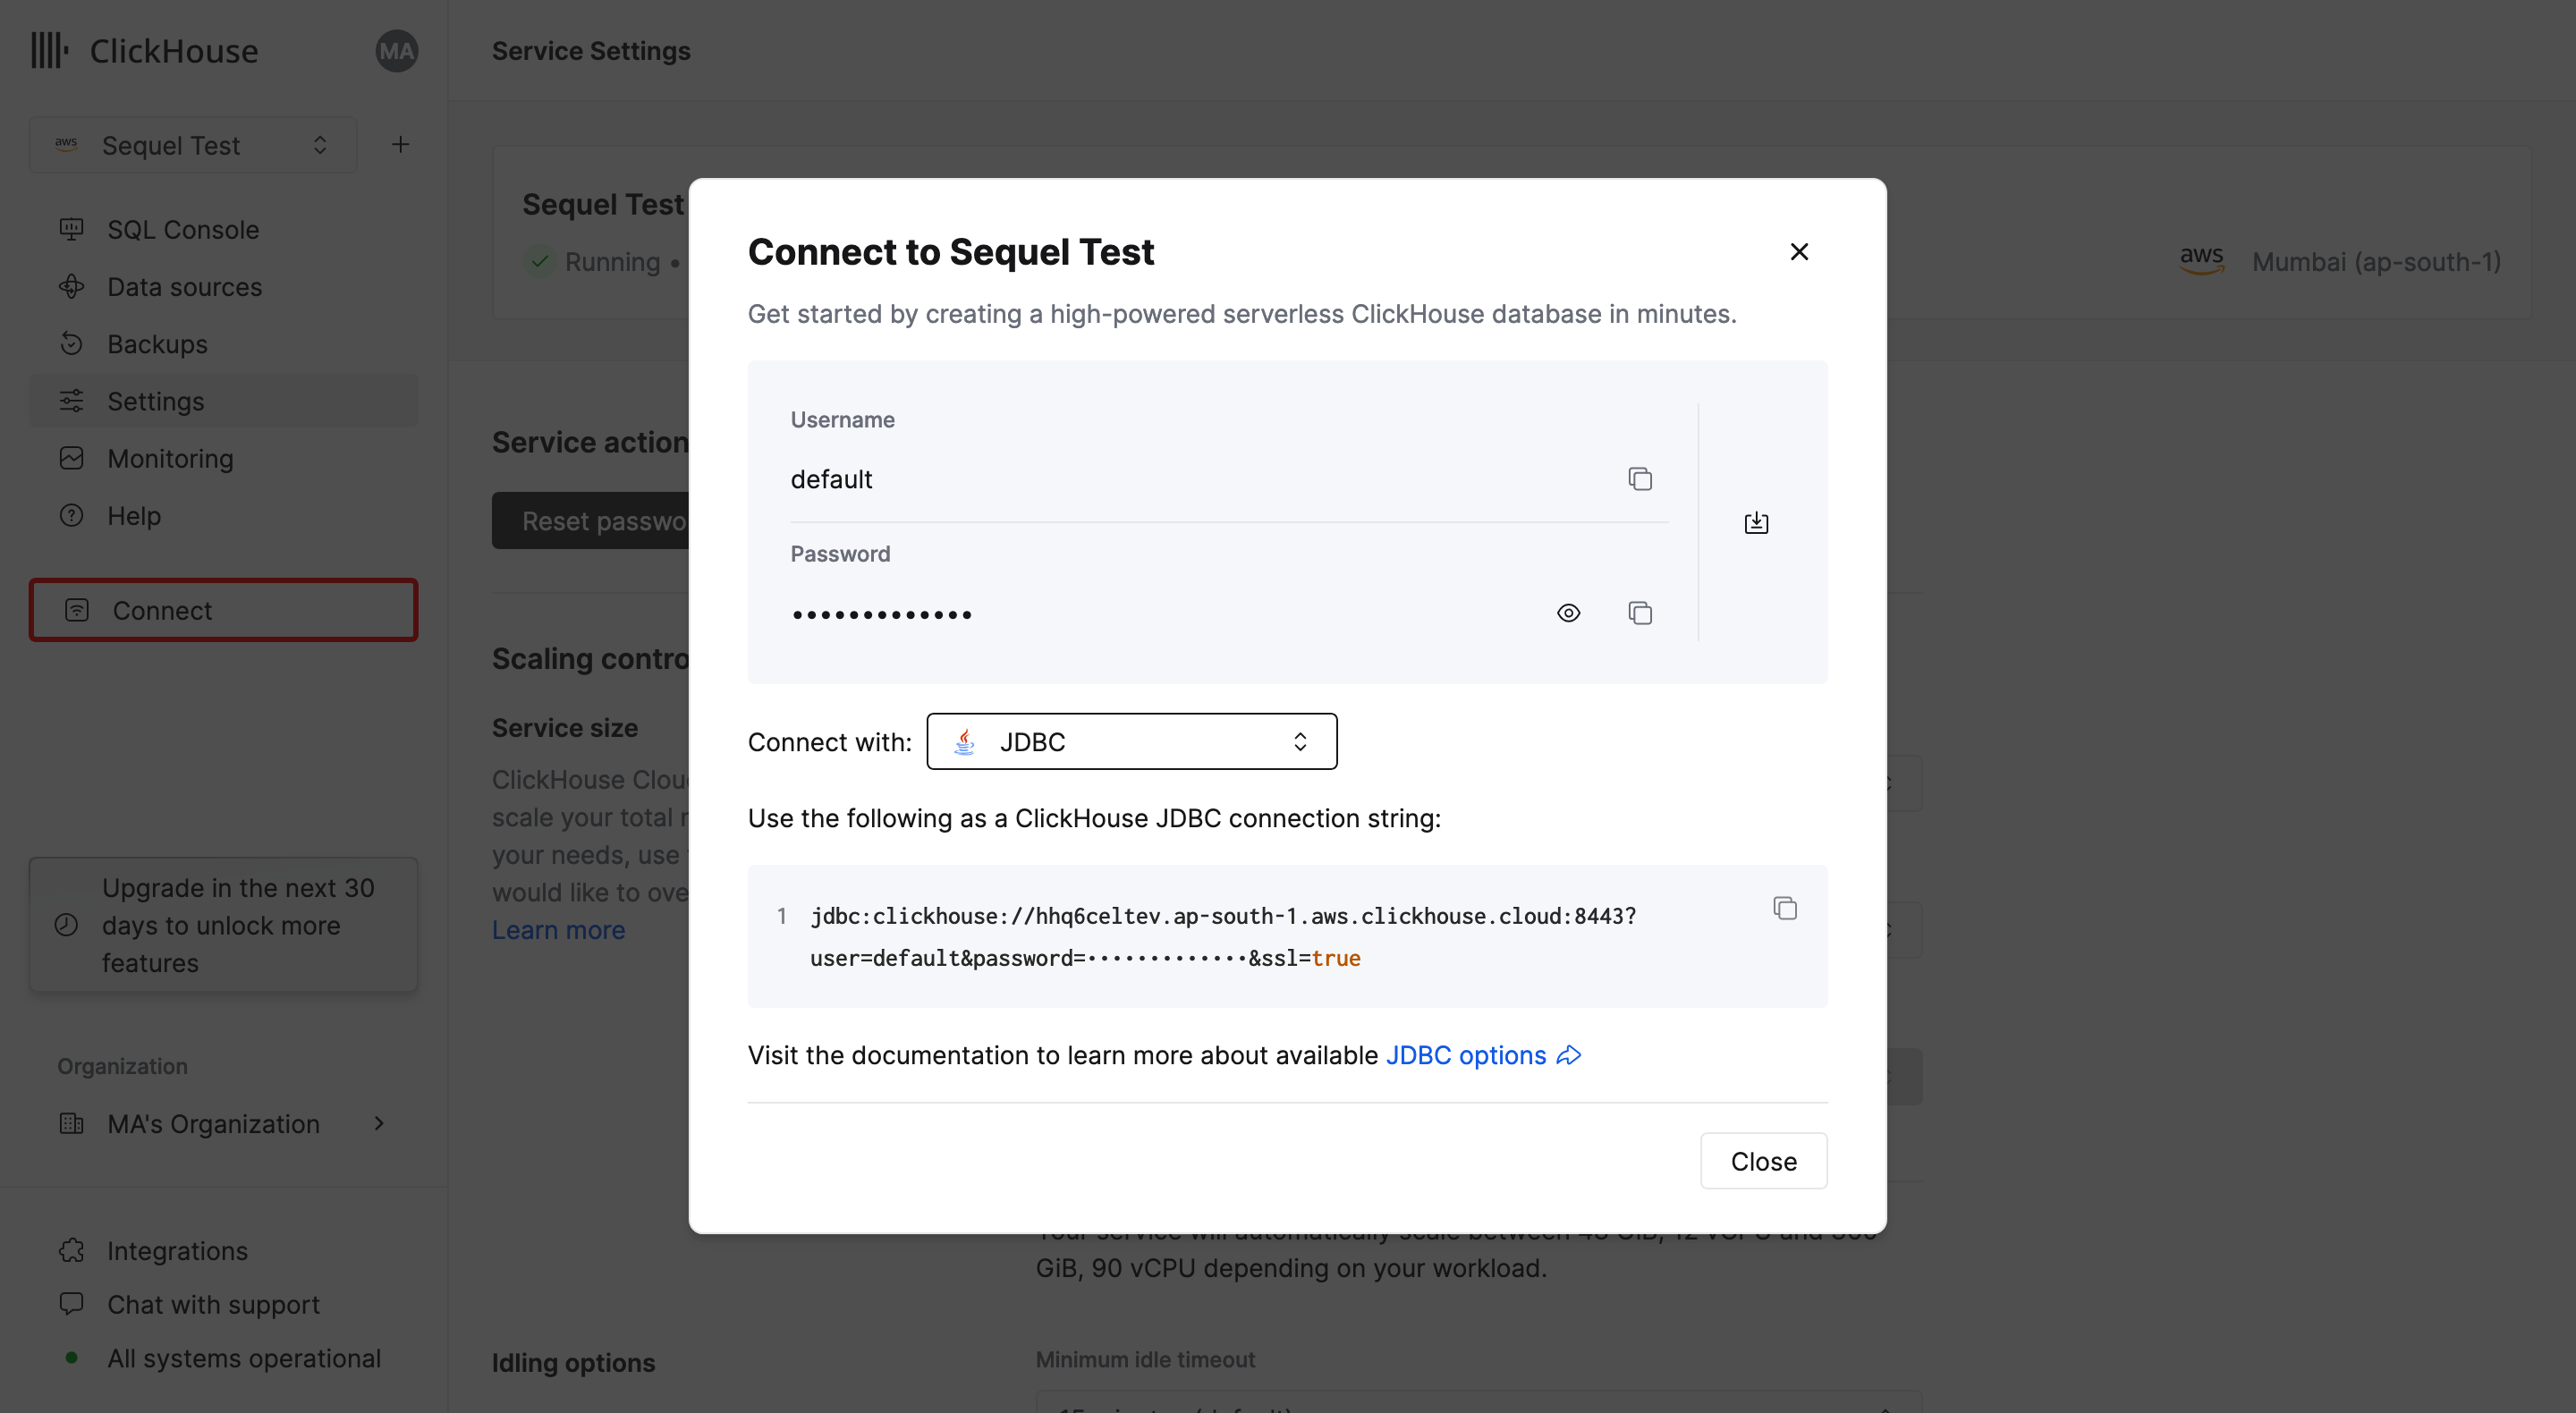
Switch to JDBC connection type by clicking on dropdown and copy the connection string to extract the parameters

Once you look at the connection string, you can extract the credentials follows
jdbc:clickhouse://mxh1lsdlskdiw.ap-south-1.aws.clickhouse.cloud:8443?user=default&password=**************&ssl=true
You can extract the information required for the form as below
Example Credentials:
| Field | Value |
|---|---|
| Host | mxh1lsdlskdiw.ap-south-1.aws.clickhouse.cloud |
| Port | 8443 |
| Username | default |
| Password | (from connection details) |
Step 6: Test and Save the Connection
Click Test and Save to validate the connection details. If the connection is successful, Sequel will open the explorer view for your connected ClickHouse database.
Step 7: Start Querying Your Database
You can now start querying your ClickHouse-cloud-hosted database using Sequel’s natural language querying interface. Simply ask a question or write an SQL query, and Sequel will execute it against your ClickHouse database.
Troubleshooting
If you encounter issues during the connection process:
-
Connection Errors:
- Verify your credentials and ensure your ClickHouse server is reachable from Sequel's network.
- Check if you need to whitelist Sequel's IP addresses in your firewall settings.
-
Protocol Issues:
- Ensure you're using the correct port for your chosen protocol (8123 for HTTP, 8443 for HTTPS, 9000 for native/TCP).
- If using HTTPS, make sure SSL is properly configured on both ends.
-
Authentication Problems:
- Confirm that the user has the necessary permissions to access the specified database and execute queries.
- If using non-default authentication methods, ensure they're properly configured.
-
Performance Concerns:
- For large datasets, consider using the native/TCP protocol instead of HTTP for better performance.
- Optimize your ClickHouse settings for your specific use case and hardware.
By following these steps, you can easily connect your ClickHouse database to Sequel, allowing you to query and visualize data effortlessly.
For additional assistance, you can visit the ClickHouse documentation or Sequel support.
On this page
- Step 1: Log in to your Sequel Account
- Step 2: Open New Connection Screen
- Step 3: Choose ClickHouse Database Connection
- Connecting Your ClickHouse Cloud Database to Sequel
- Step 1: Log in to Your ClickHouse Cloud
- Step 2: Chosse your project and click on connect
- Step 4: Access the Connection Details
- Step 6: Test and Save the Connection
- Step 7: Start Querying Your Database
- Troubleshooting