Railway MySQL
To connect your Railway MySQL Database to Sequel, follow the below steps.
Step 1: Log in to your Sequel Account
Log in to your Sequel account here. If you don’t have an account, you can create one via the signup page.
Step 2: Open New Connection Screen
On the databases listing page, click on "Connect Database". This will open the connection screen.
Step 3: Choose MySQL Database Connection
In the database connector catalog, select MySQL. This will open a connection form. Provide a display name that will be visible to all users in your workspace.
Connecting Your Railway MySQL Database to Sequel
Follow this guide to connect your Railway-hosted MySQL instance to Sequel for querying and visualizing your data.
Step 1: Log in to Your Railway Account
Go to Railway and log in to your account.
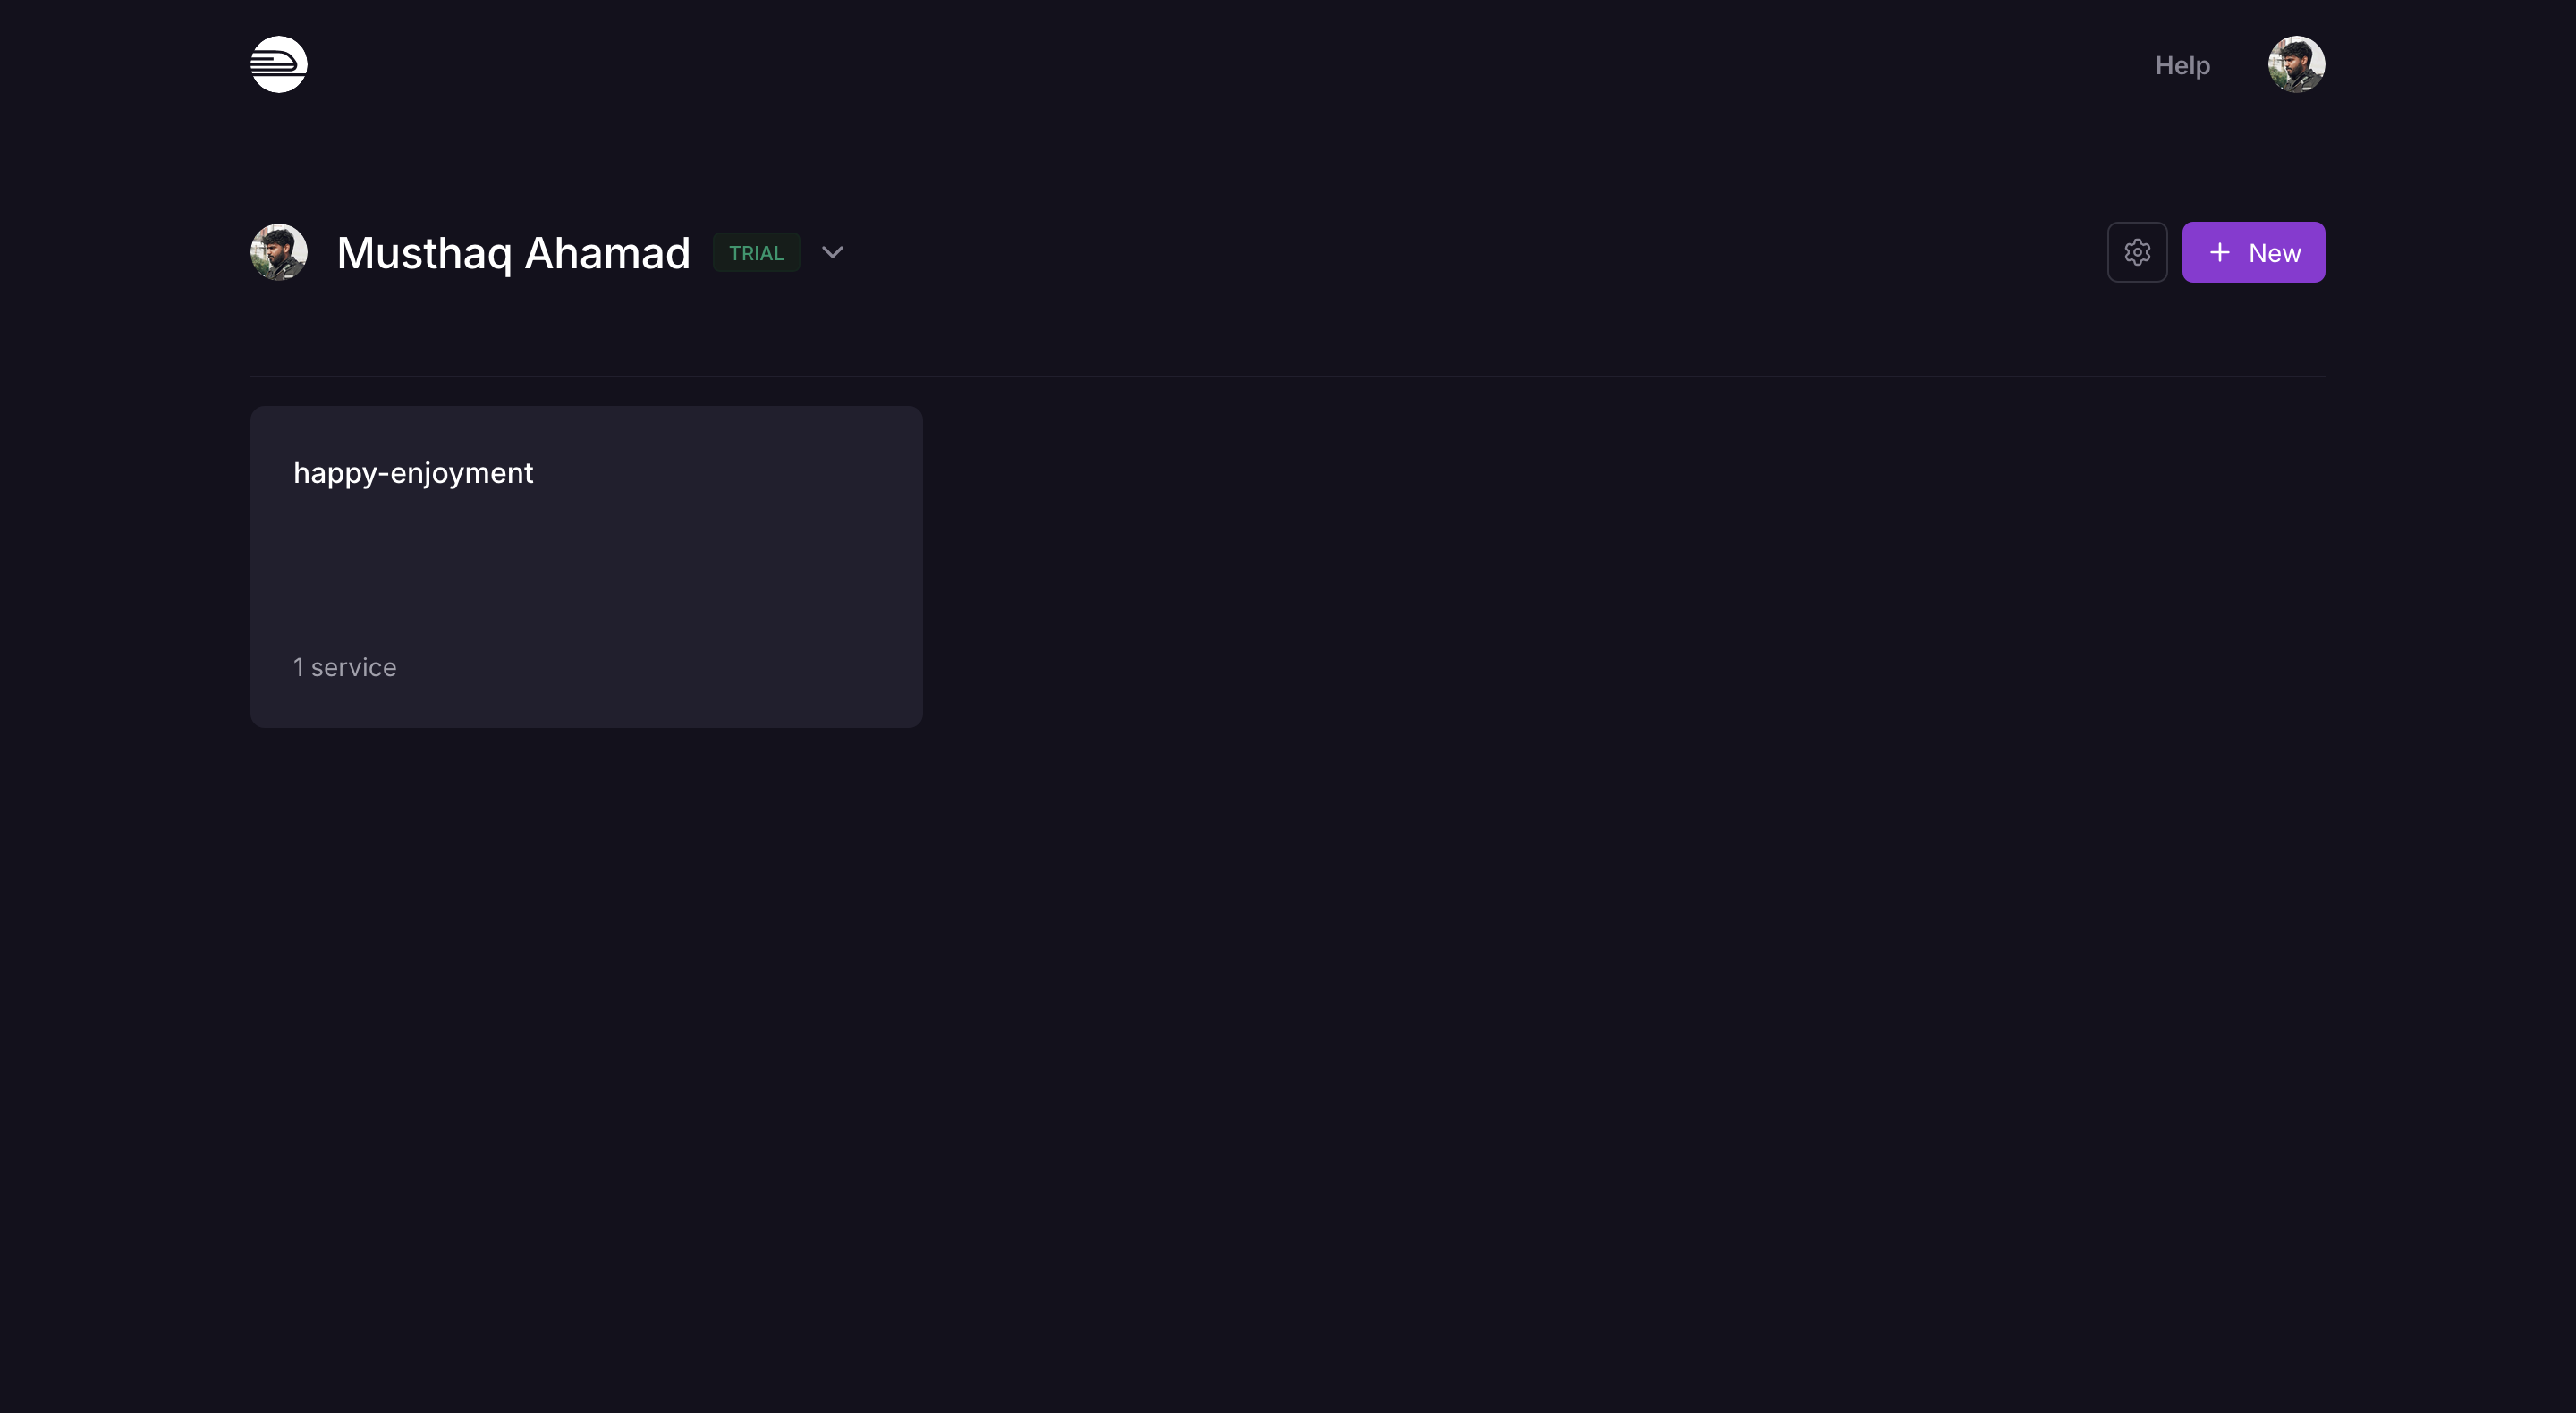
Step 2: Choose Your Project
After logging in, select the project where your MySQL database is hosted from the list of projects on your dashboard.

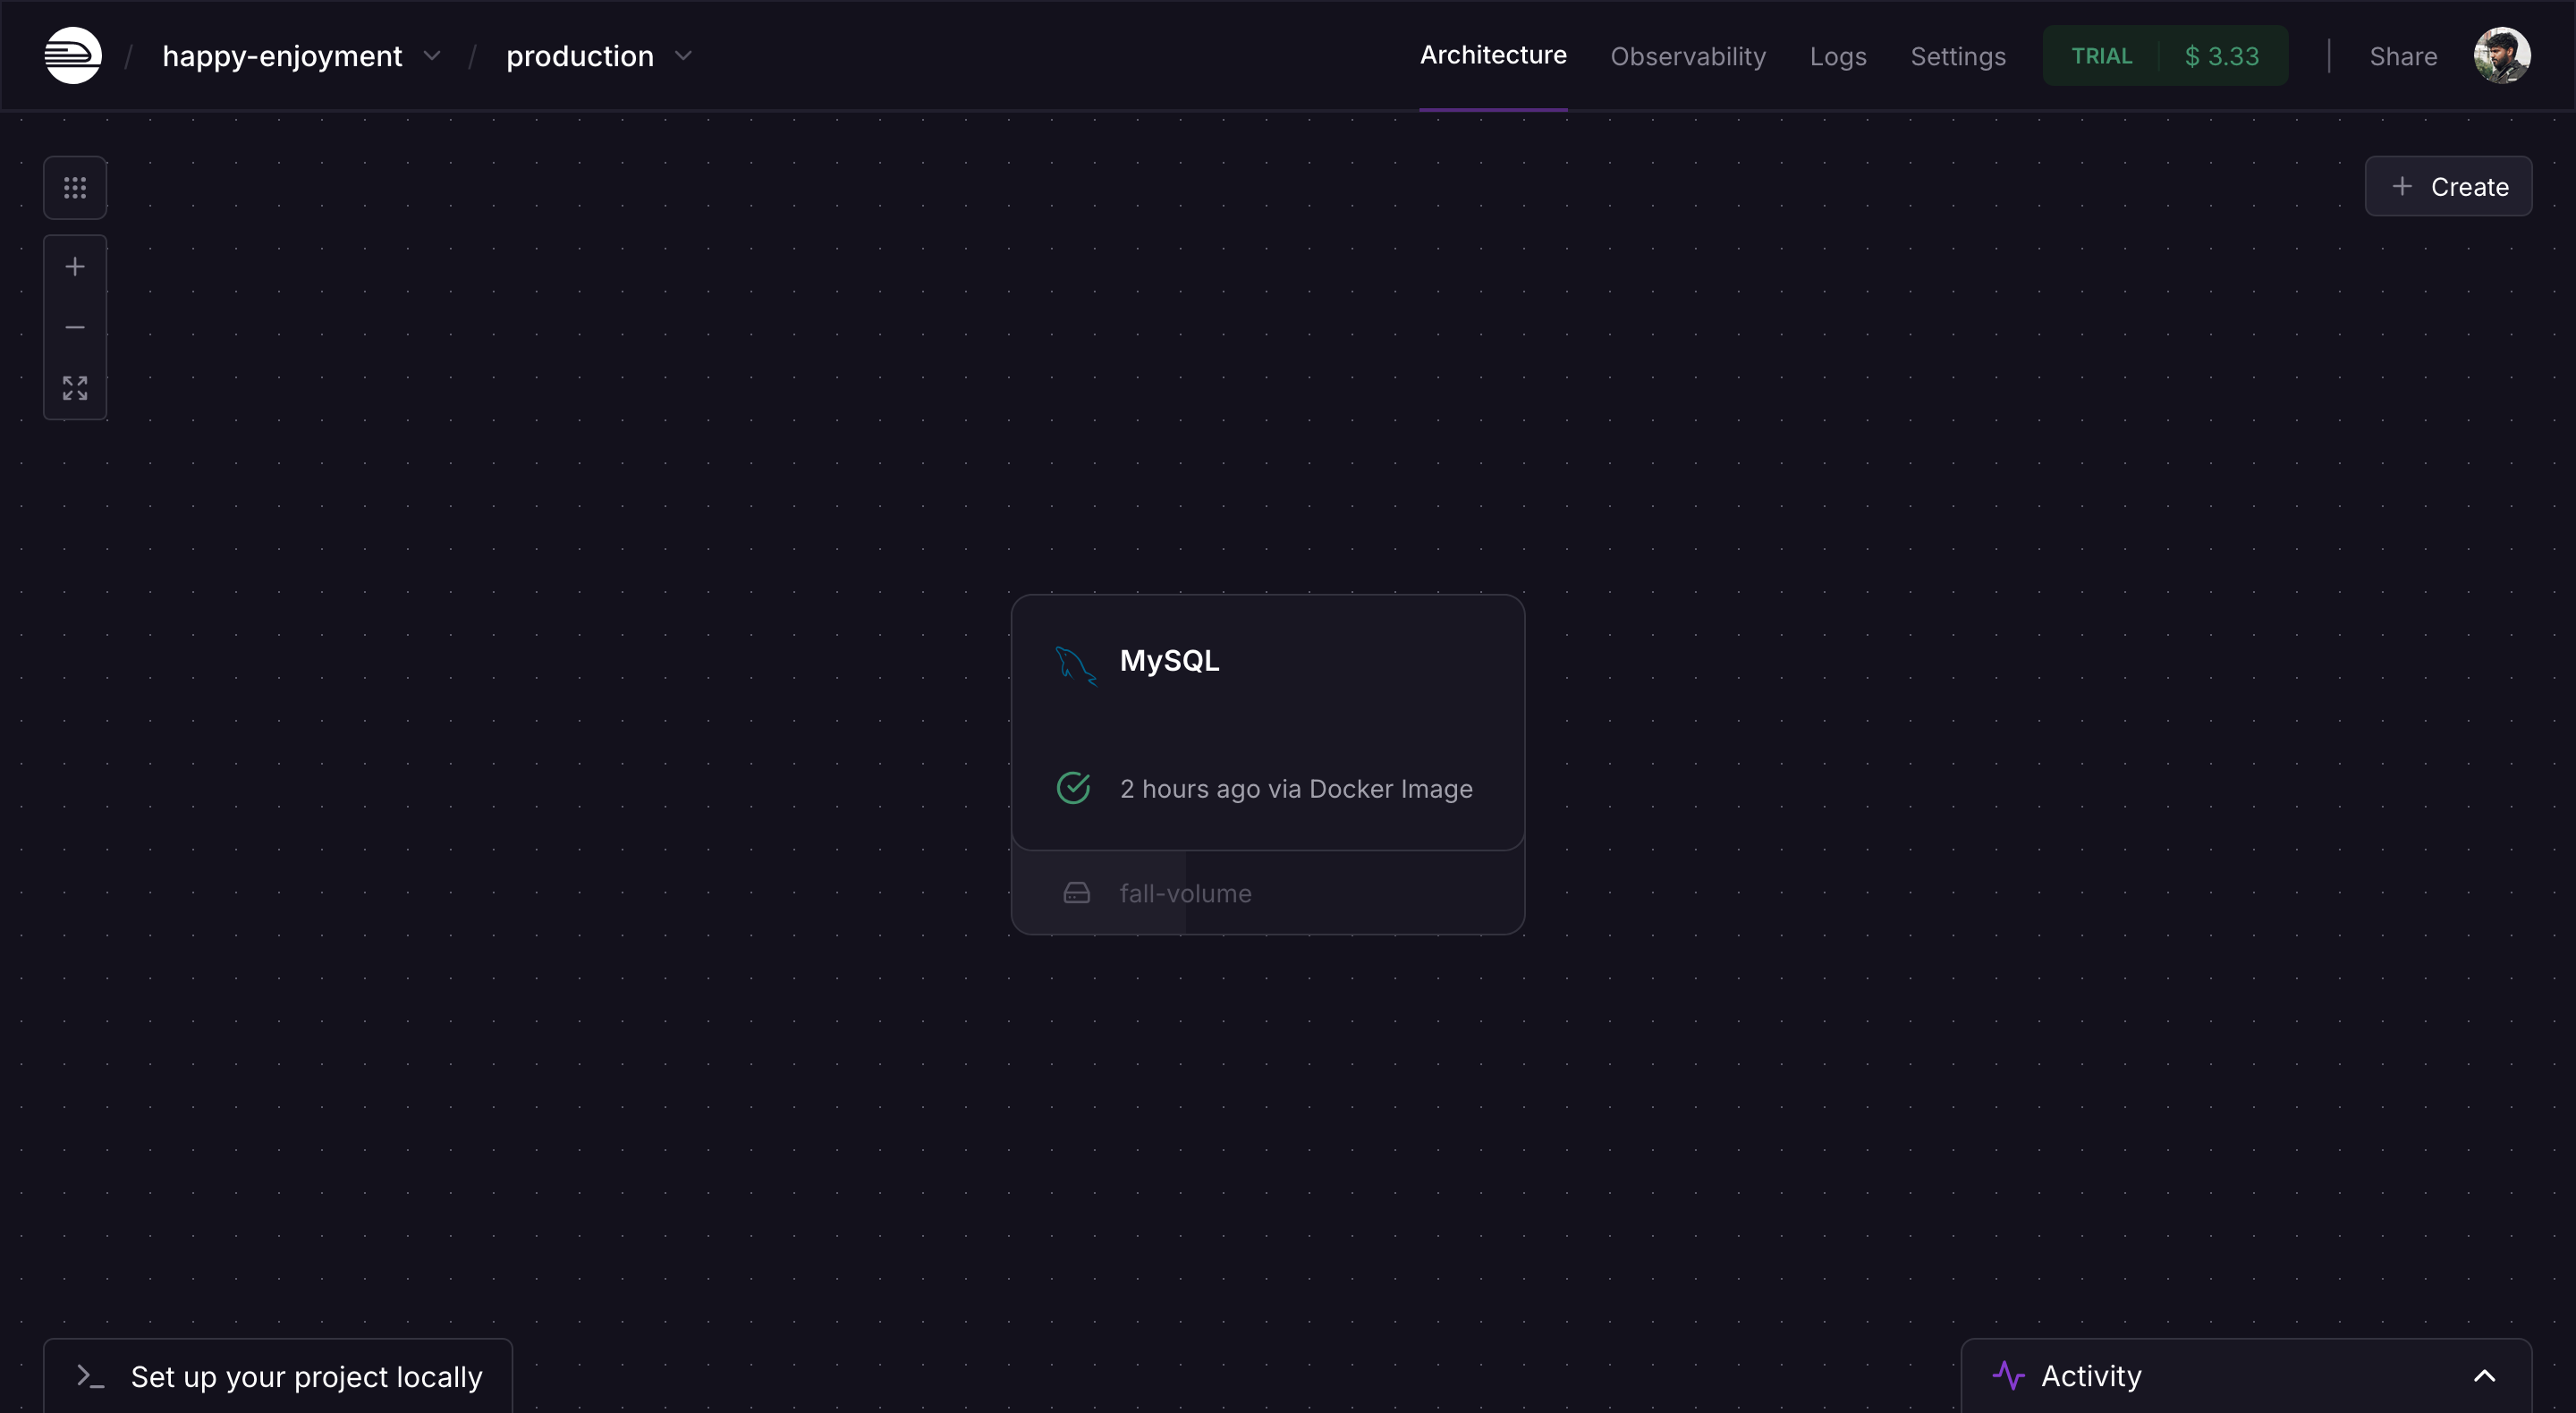
Step 3: Select Your MySQL Instance
In the project dashboard, look for the MySQL instance under the "Databases" section. Click on it to open the instance details.

Step 4: Access the Connection Details
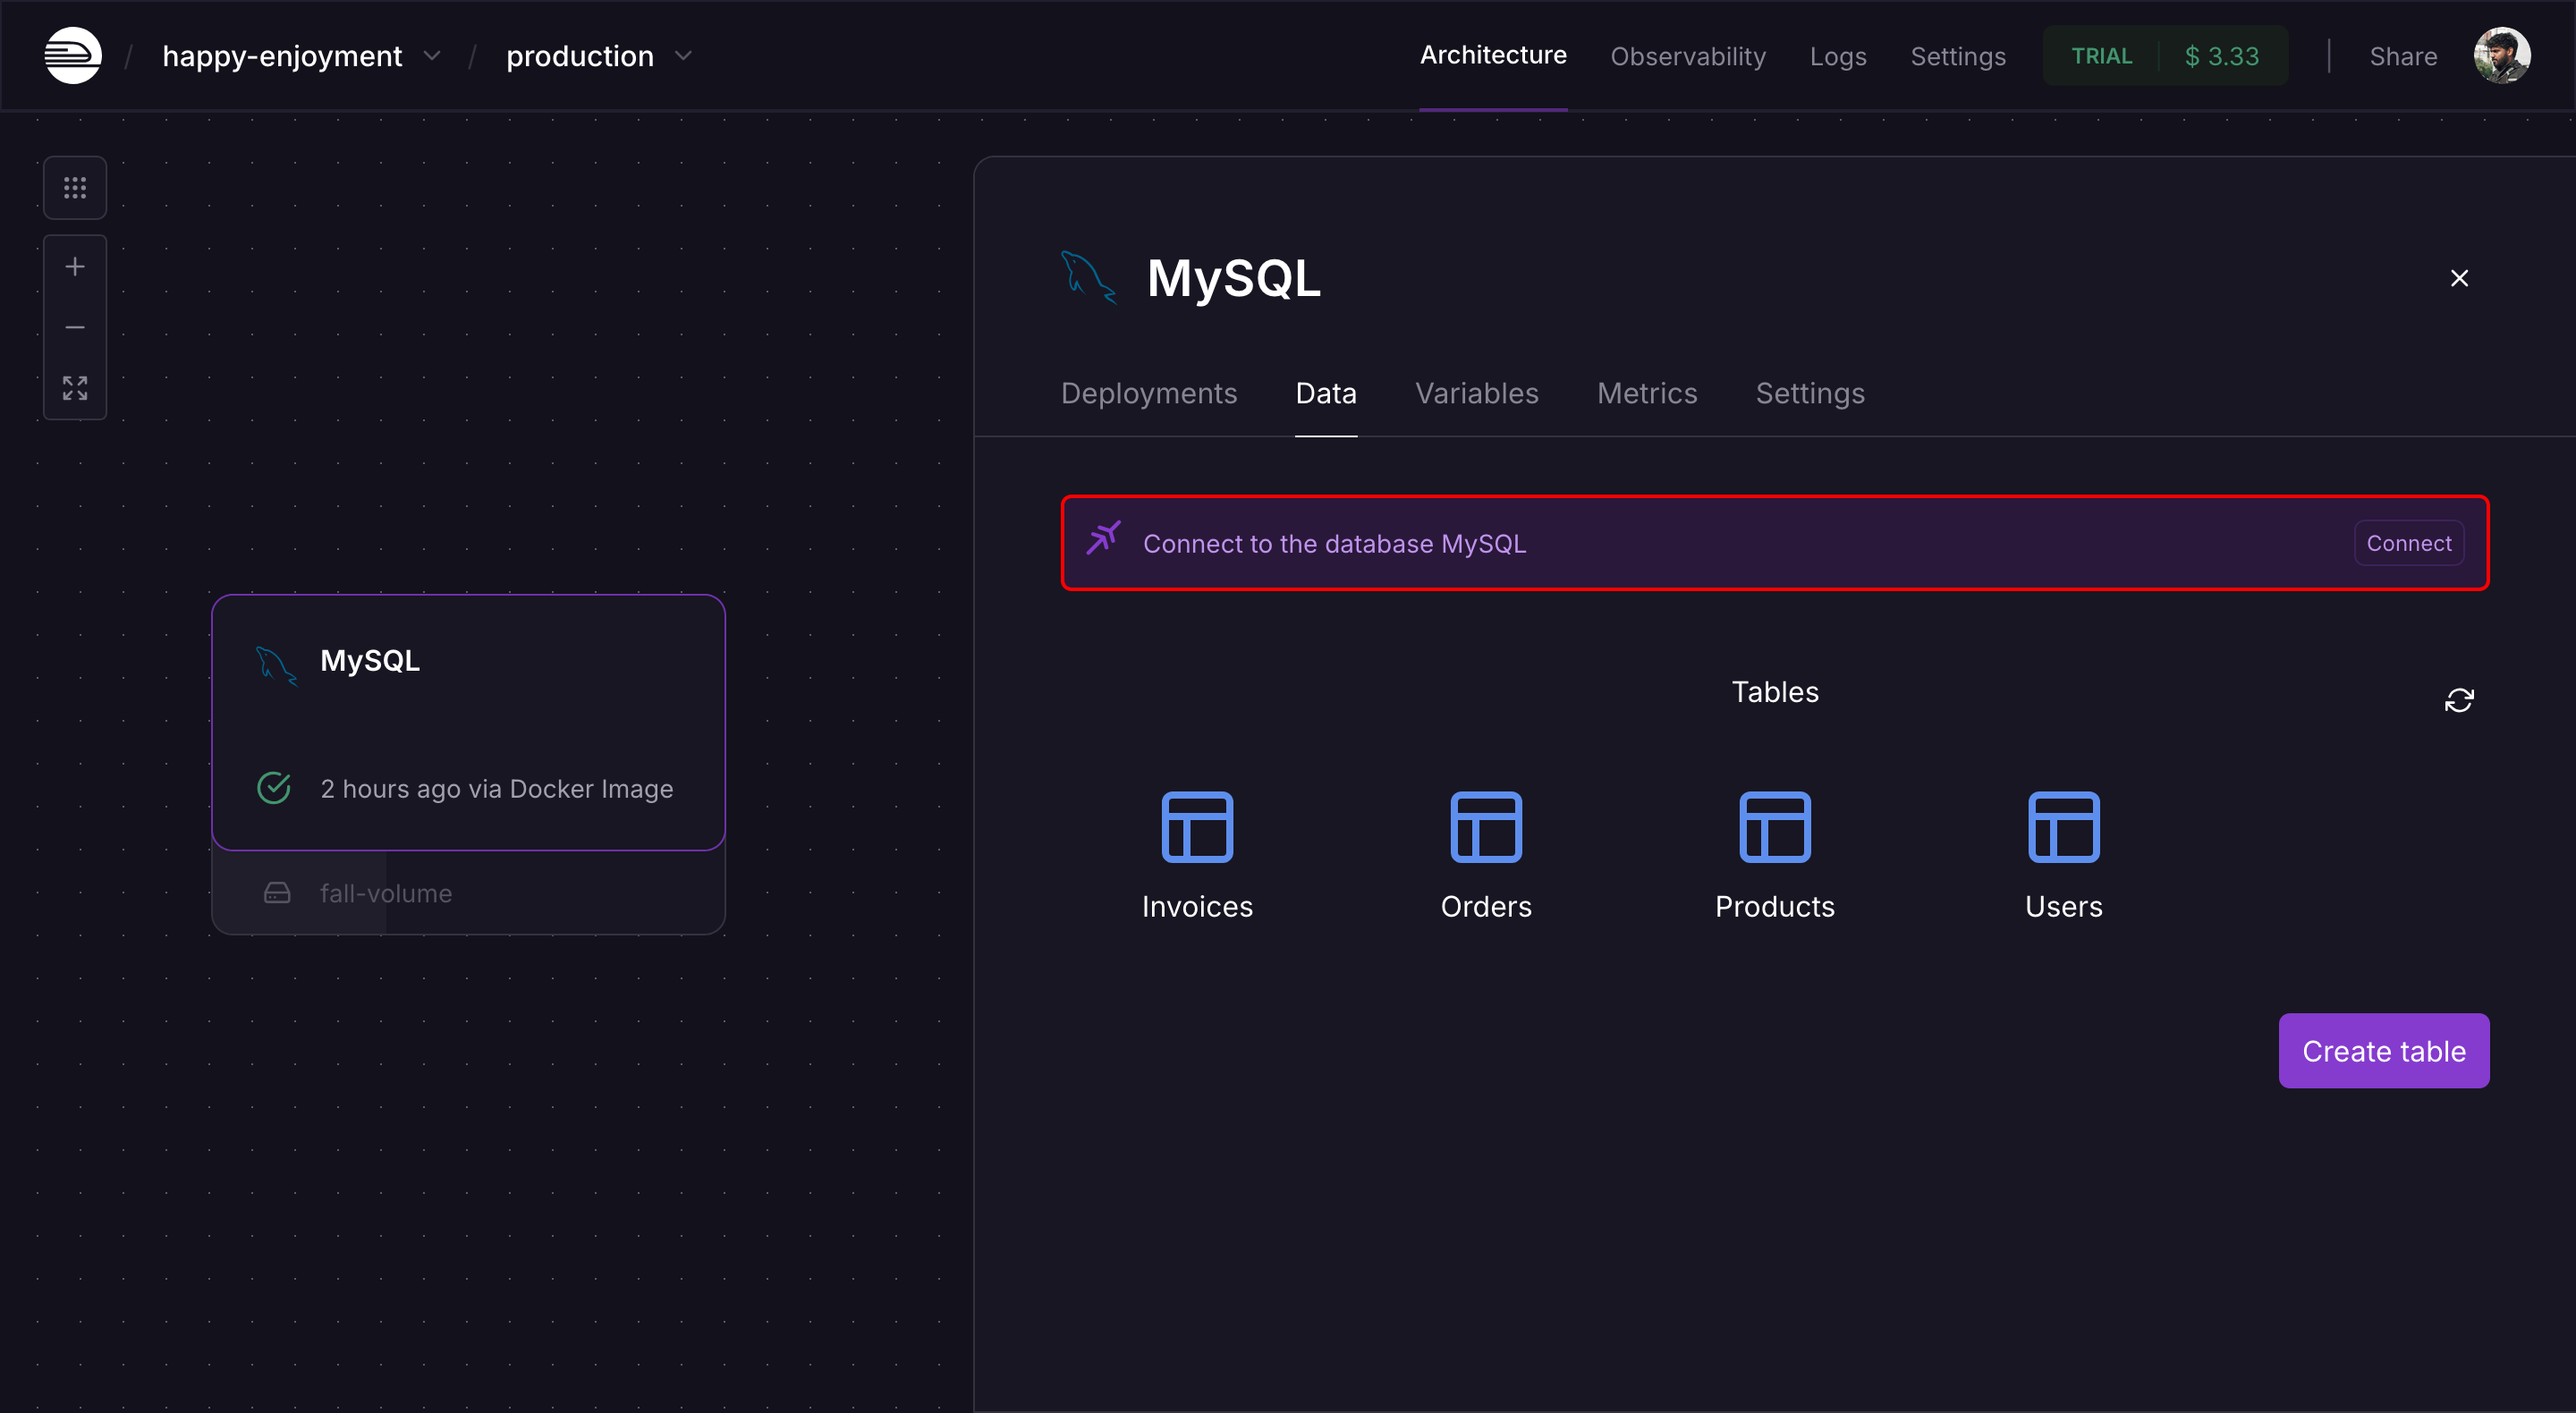
- Switch to the Data tab by clicking on it in the MySQL instance dashboard.
- On the top-right corner, click the Connect button. This will open the connection details screen.

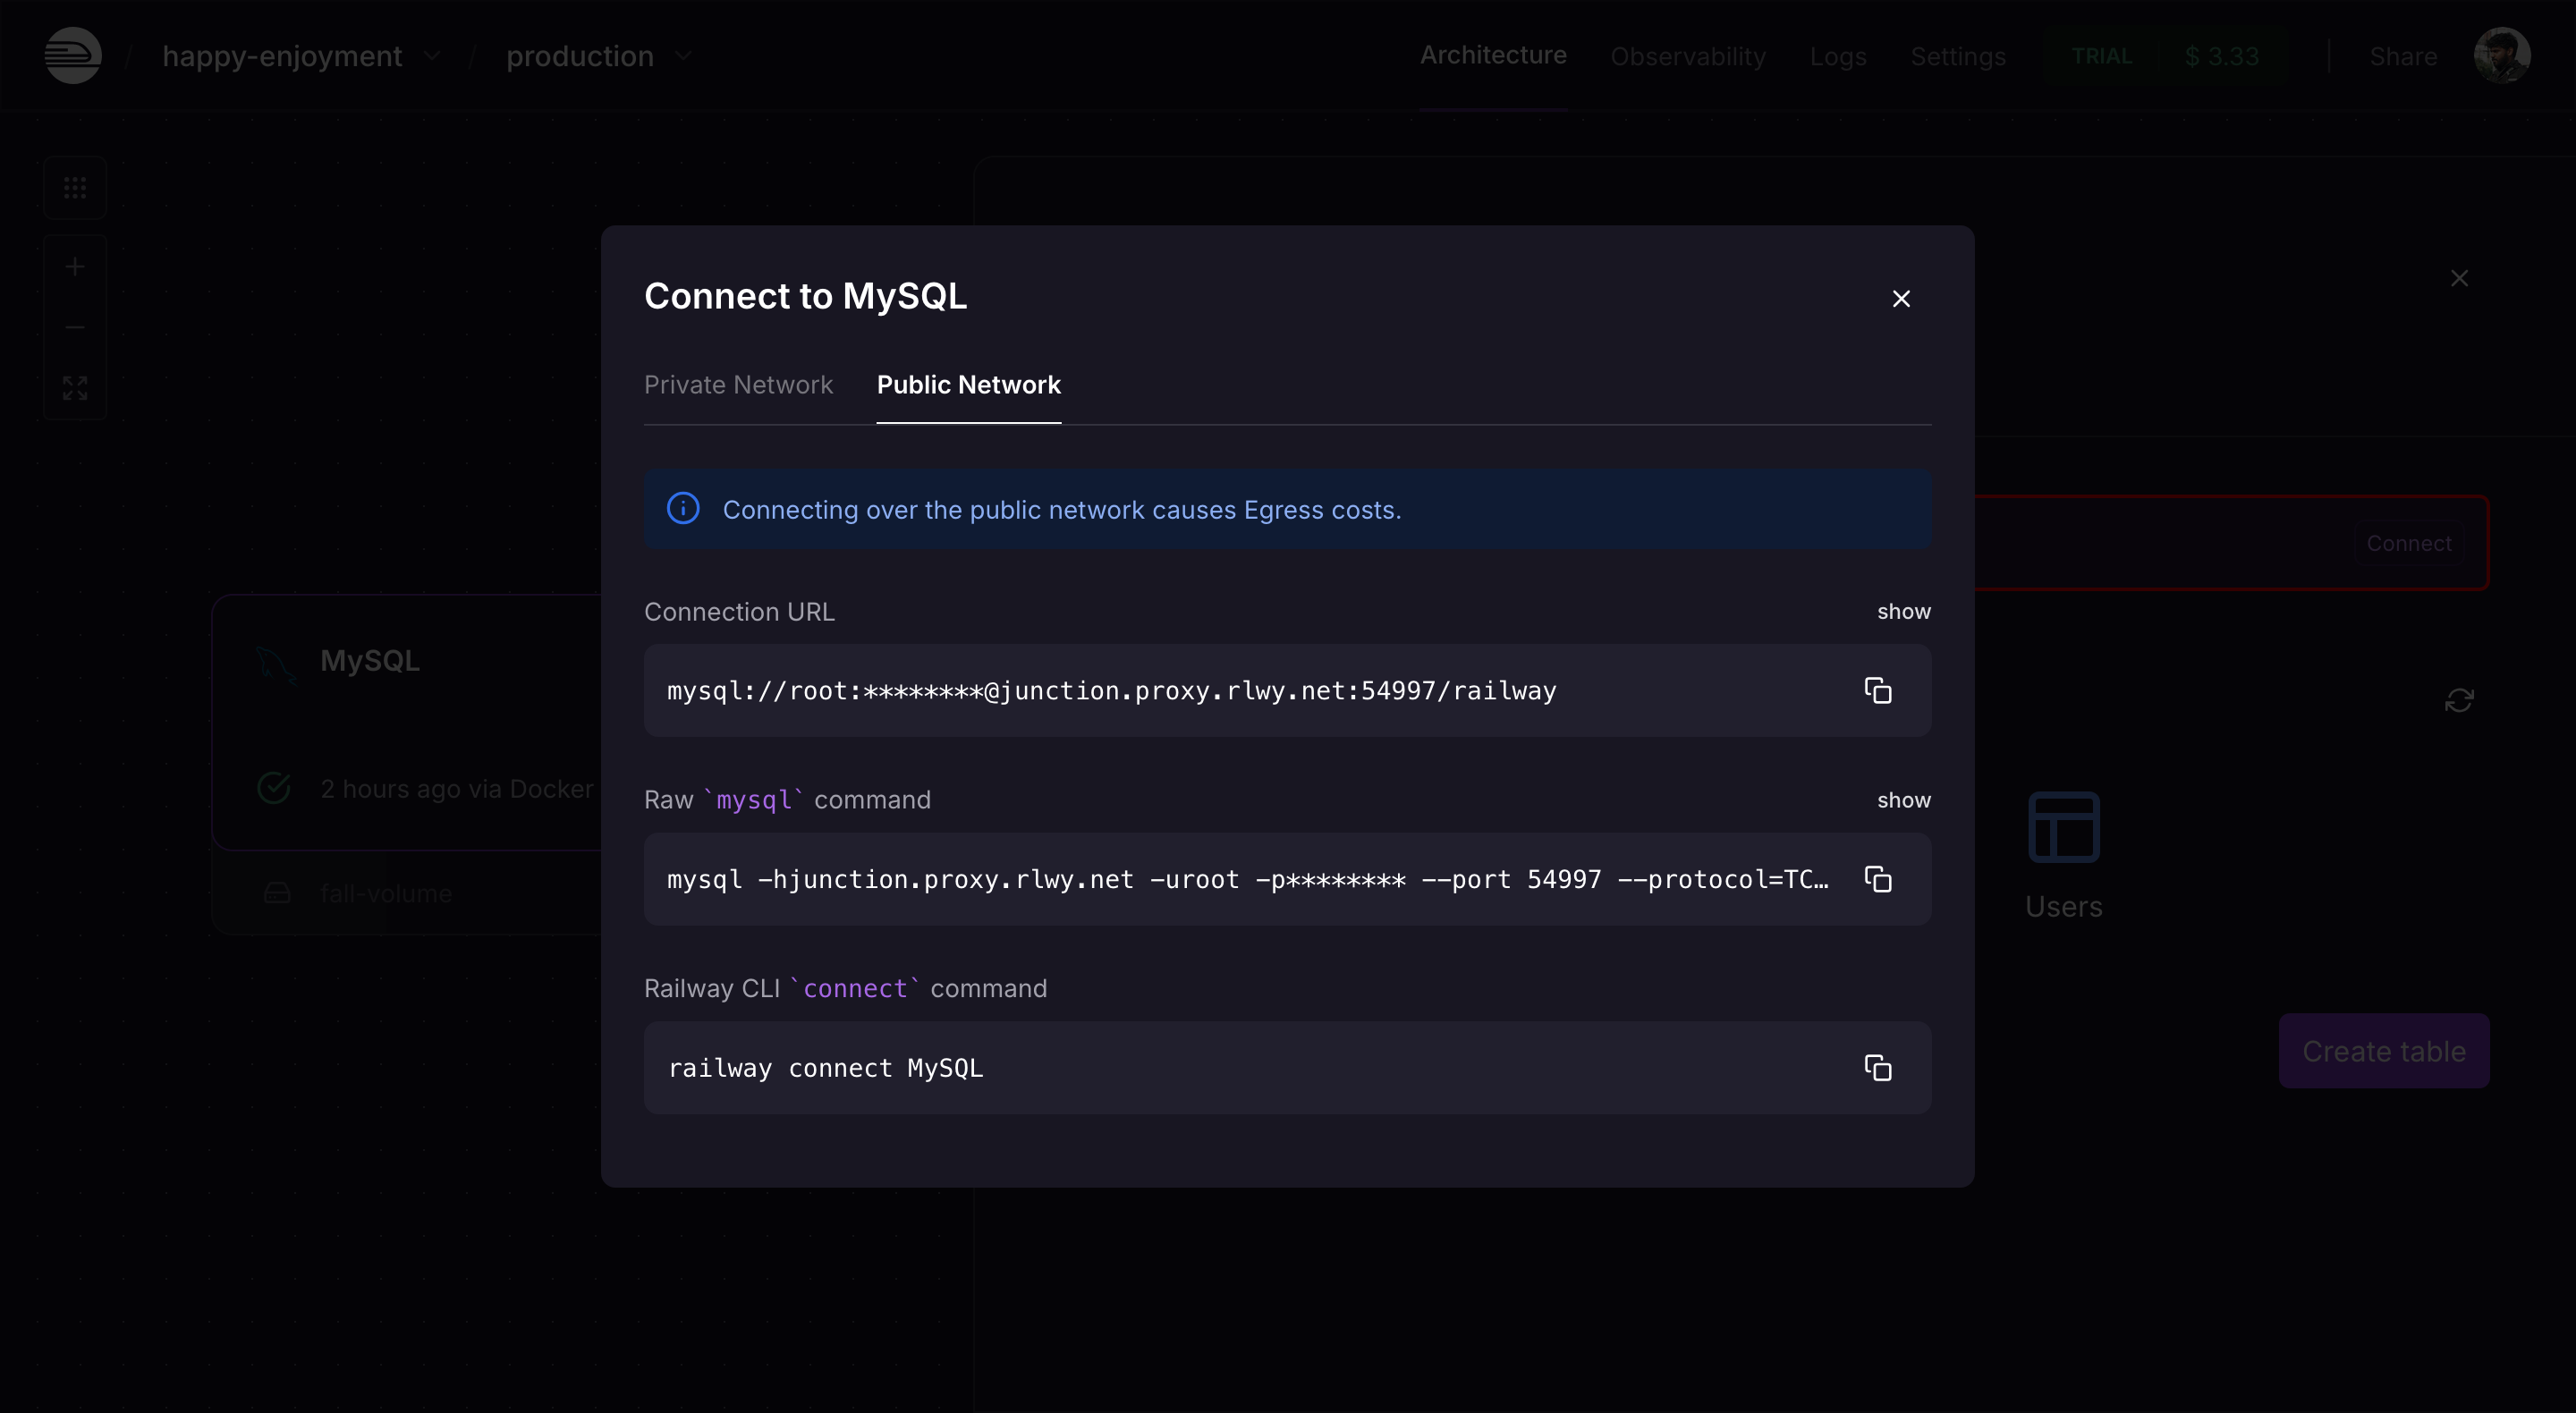
Step 5: Copy the Connection String and Extract Parameters
You will now see a connection string like the one in the screenshot below:

Example Connection String:
mysql://root:********@junction.proxy.rlwy.net:54997/railway
Here’s how you extract the required parameters:
- Host:
junction.proxy.rlwy.net - Port:
54997(MySQL default is 3306, but Railway might assign a different one) - Username:
root - Password: (The actual password will be shown as
********, but you can reveal it by clicking the "show" button next to the connection string) - Database:
railway
Example Credentials:
| Field | Value |
|---|---|
| Host | junction.proxy.rlwy.net |
| Port | 54997 |
| Username | root |
| Password | (from connection details) |
| Database | railway |
Step 6: Enter Credentials into Sequel
Go back to Sequel’s MySQL integration form and enter the credentials you copied from Railway:
- Host Address: Paste the host address from Railway.
- Port: The default MySQL port is
3306. - Username: Use the MySQL username provided by Railway.
- Password: Enter the password you copied.
- Database: Specify the MySQL database name from Railway.
Step 7: Test and Save the Connection
Click Test and Save to validate the connection details. If the connection is successful, Sequel will open the explorer view for your connected MySQL database.
Step 8: Start Querying Your Database
You can now start querying your Railway-hosted MySQL database using Sequel’s natural language querying interface. Simply ask a question or write an SQL query, and Sequel will execute it against your MySQL database.
Troubleshooting
If you run into any issues during the connection process:
- Connection Errors: Double-check the credentials in Railway's connection info.
- Firewall Issues: Ensure that your Railway MySQL instance is publicly accessible or that you have proper network configurations set up.
- SSL Requirements: If required, make sure you configure SSL settings properly in Sequel.
By following these steps, you can easily connect your Railway MySQL database to Sequel, allowing you to query and visualize data effortlessly.
For additional assistance, you can visit the Railway documentation or Sequel support.
On this page
- Step 1: Log in to your Sequel Account
- Step 2: Open New Connection Screen
- Step 3: Choose MySQL Database Connection
- Connecting Your Railway MySQL Database to Sequel
- Step 1: Log in to Your Railway Account
- Step 2: Choose Your Project
- Step 3: Select Your MySQL Instance
- Step 4: Access the Connection Details
- Step 5: Copy the Connection String and Extract Parameters
- Step 6: Enter Credentials into Sequel
- Step 7: Test and Save the Connection
- Step 8: Start Querying Your Database
- Troubleshooting